How to add a Variable product in WooCommerce to your WordPress website with Divi

Variable products are a product type in WooCommerce that lets you offer a set of variations on a product.
Variable products are a product type in WooCommerce that lets you offer a set of variations on a product, with control over prices, stock, image, and more for each variation. They can be used for a product like a shirt, where you can offer a large, medium and small and in different colors.
Let us know if this tutorial has helped you or if you have any questions or comments!
Update: 26/06/2023) In light of our shared commitment to delivering valuable content, we at Pod Creative wanted to encourage our readers to explore this article on Optimizing WooCommerce Product Variations for Maximum Conversion by the team at wpastra.com.
A little bit about Attributes
To create a variable product, an attribute must first be defined for the product. These attributes can then be used to make a distinction between different variations. For example, if you’re selling T-shirts online, you can create an attribute for clothing sizes extra small all the way up to 6XL!
1. Click on the products Tab on the left hand side bar
Hover your mouse over Products and select the tab. When the products page opens, click on Add New Product.
2. Making it a Variable Product
A) Enter the product name you desire.
B) Select your product category (you can also add a new category).
C) Set your product image.
D) Select Variable Product from the drop-down beside Product Data.
E) Add your main product description.
F) Click Save Draft.
3. Setting some Attributes
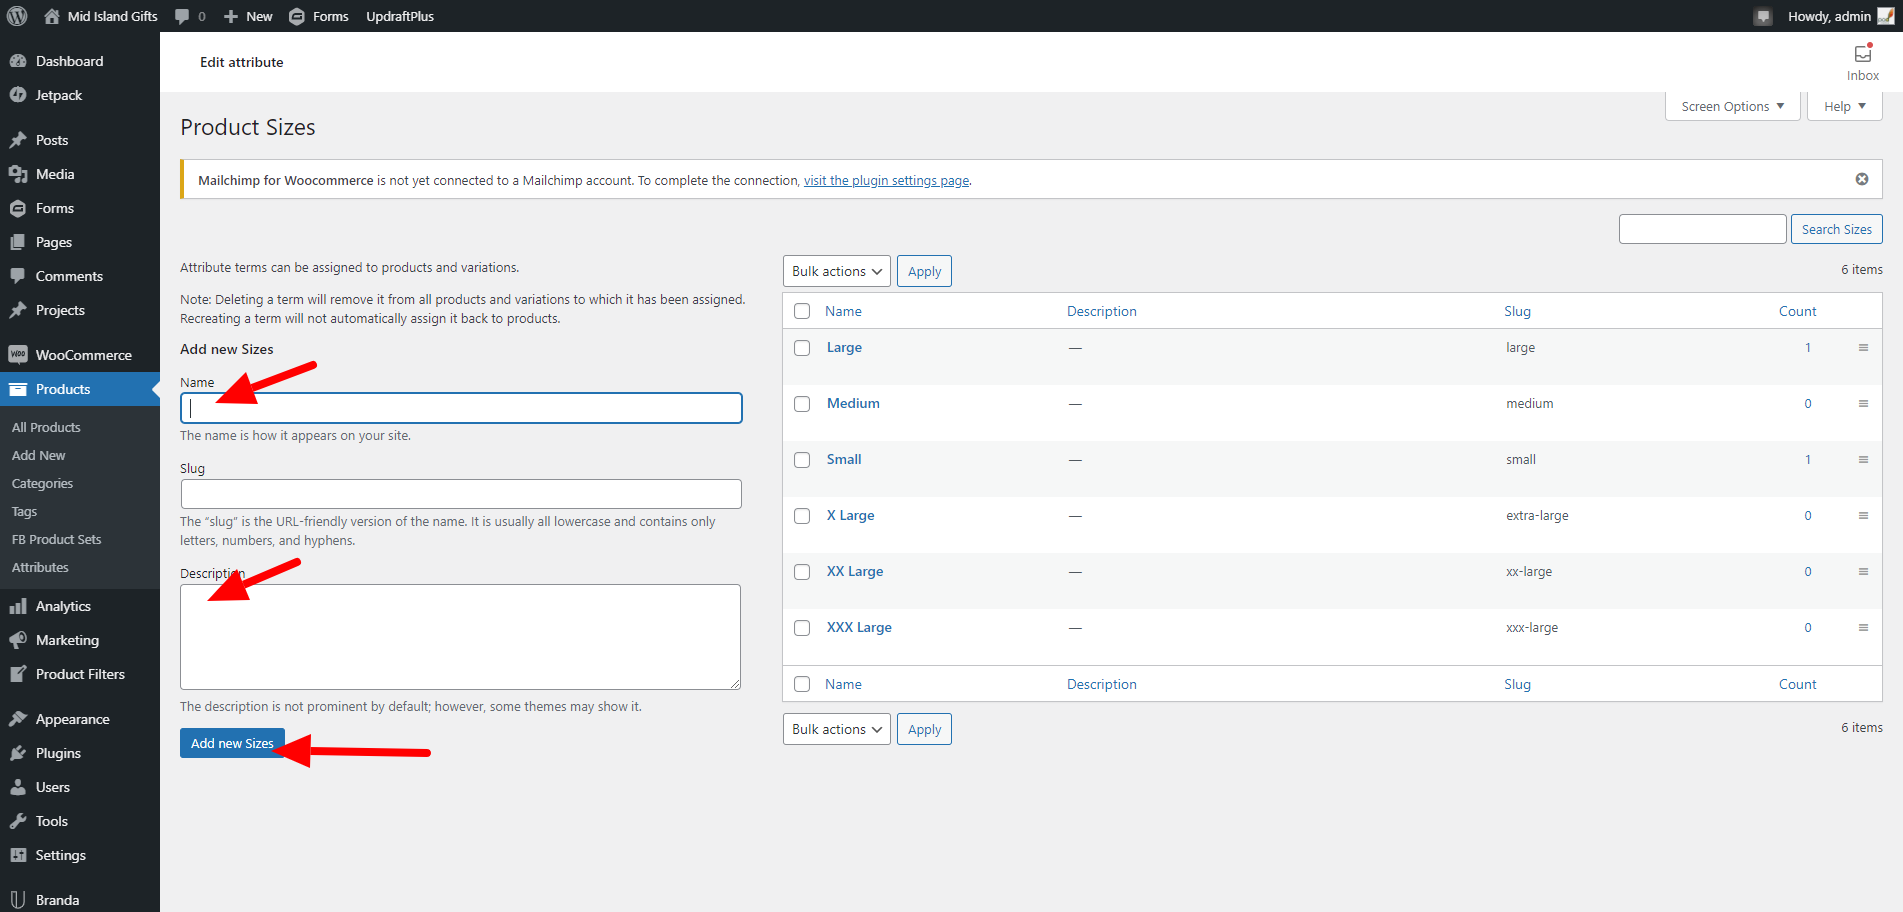
A) Click ‘Attributes’ in the left-hand black side bar. It’s located underneath FB Product Sets.
B) Name your Attribute. For example, Clothing, Colour, Scent.
C) Click Add Attribute.
D) Click Configure Terms underneath the option you wish to add new Variable terms to.

E) Add the name and description of the Variable(s) you would like to use.
F) Once you have set up all your attributes navigate back to your product and click Edit.

4. Setting up the Attributes for the Variable Product
A) On the Edit Product page scroll down to the Product Data box and click on Attributes (between Linked Products and Variations).
B) Click the ‘Custom product attribute’ drop-down and select the appropriate attribute.
C) Click Add.
D) Click the ‘Select terms’ box and select your variation terms. (Ie. Small, Medium, Large etc.)
E) Click the ‘Use for Variations’ box and then click Save Attributes.
5. Adding the variable products
A) Click on Variations (below Attributes).
B) Click ‘Go’ beside the ‘Add Variation’ drop-down.
C) Click the drop down that pops up and select the variation you would like to use.
D) Click the small arrow on the far left (between the three horizontal lines and ‘remove’).
E) Click the blue image placeholder and set your product image. (Only if it is different than the main product image, if not use the main product image.)
F) Add the SKU.
G) Add the price.
H) Add the weight (in kgs).
I) Add the dimensions (in cms).
J) Add the description.

6. Replicate step #5 for as many variations as you have.
7. Let’s publish!
This will now add your product and you can repeat this process for each product you wish to add to your store.
In light of our shared commitment to delivering valuable content, we at Pod Creative wanted to refer our readers to this article on Optimizing WooCommerce Product Variations for Maximum Conversion by the team at wpastra.com.

