Woocommerce: How to refund an order in Woocommerce

When set-up correctly, refunding an order with WooCommerce is a breeze!
This will be a step-by-step guide for WooCommerce beginners, requiring you to be logged into the back end of your website to begin. This post will cover both automatic and manual refund options.
Let us know if this tutorial has helped you or if you have any questions or comments!
Here are a few reminders about making a successful product
- Make sure you have a good image.
- Make sure your description contains relevant details.
- Make sure you set a price and your inventory.
Step 1: Setting up your payment gateway
1. Start at the dashboard
Hover your mouse over WooCommerce and click on “Settings.”
2. Click on Payments

3. so many choices!
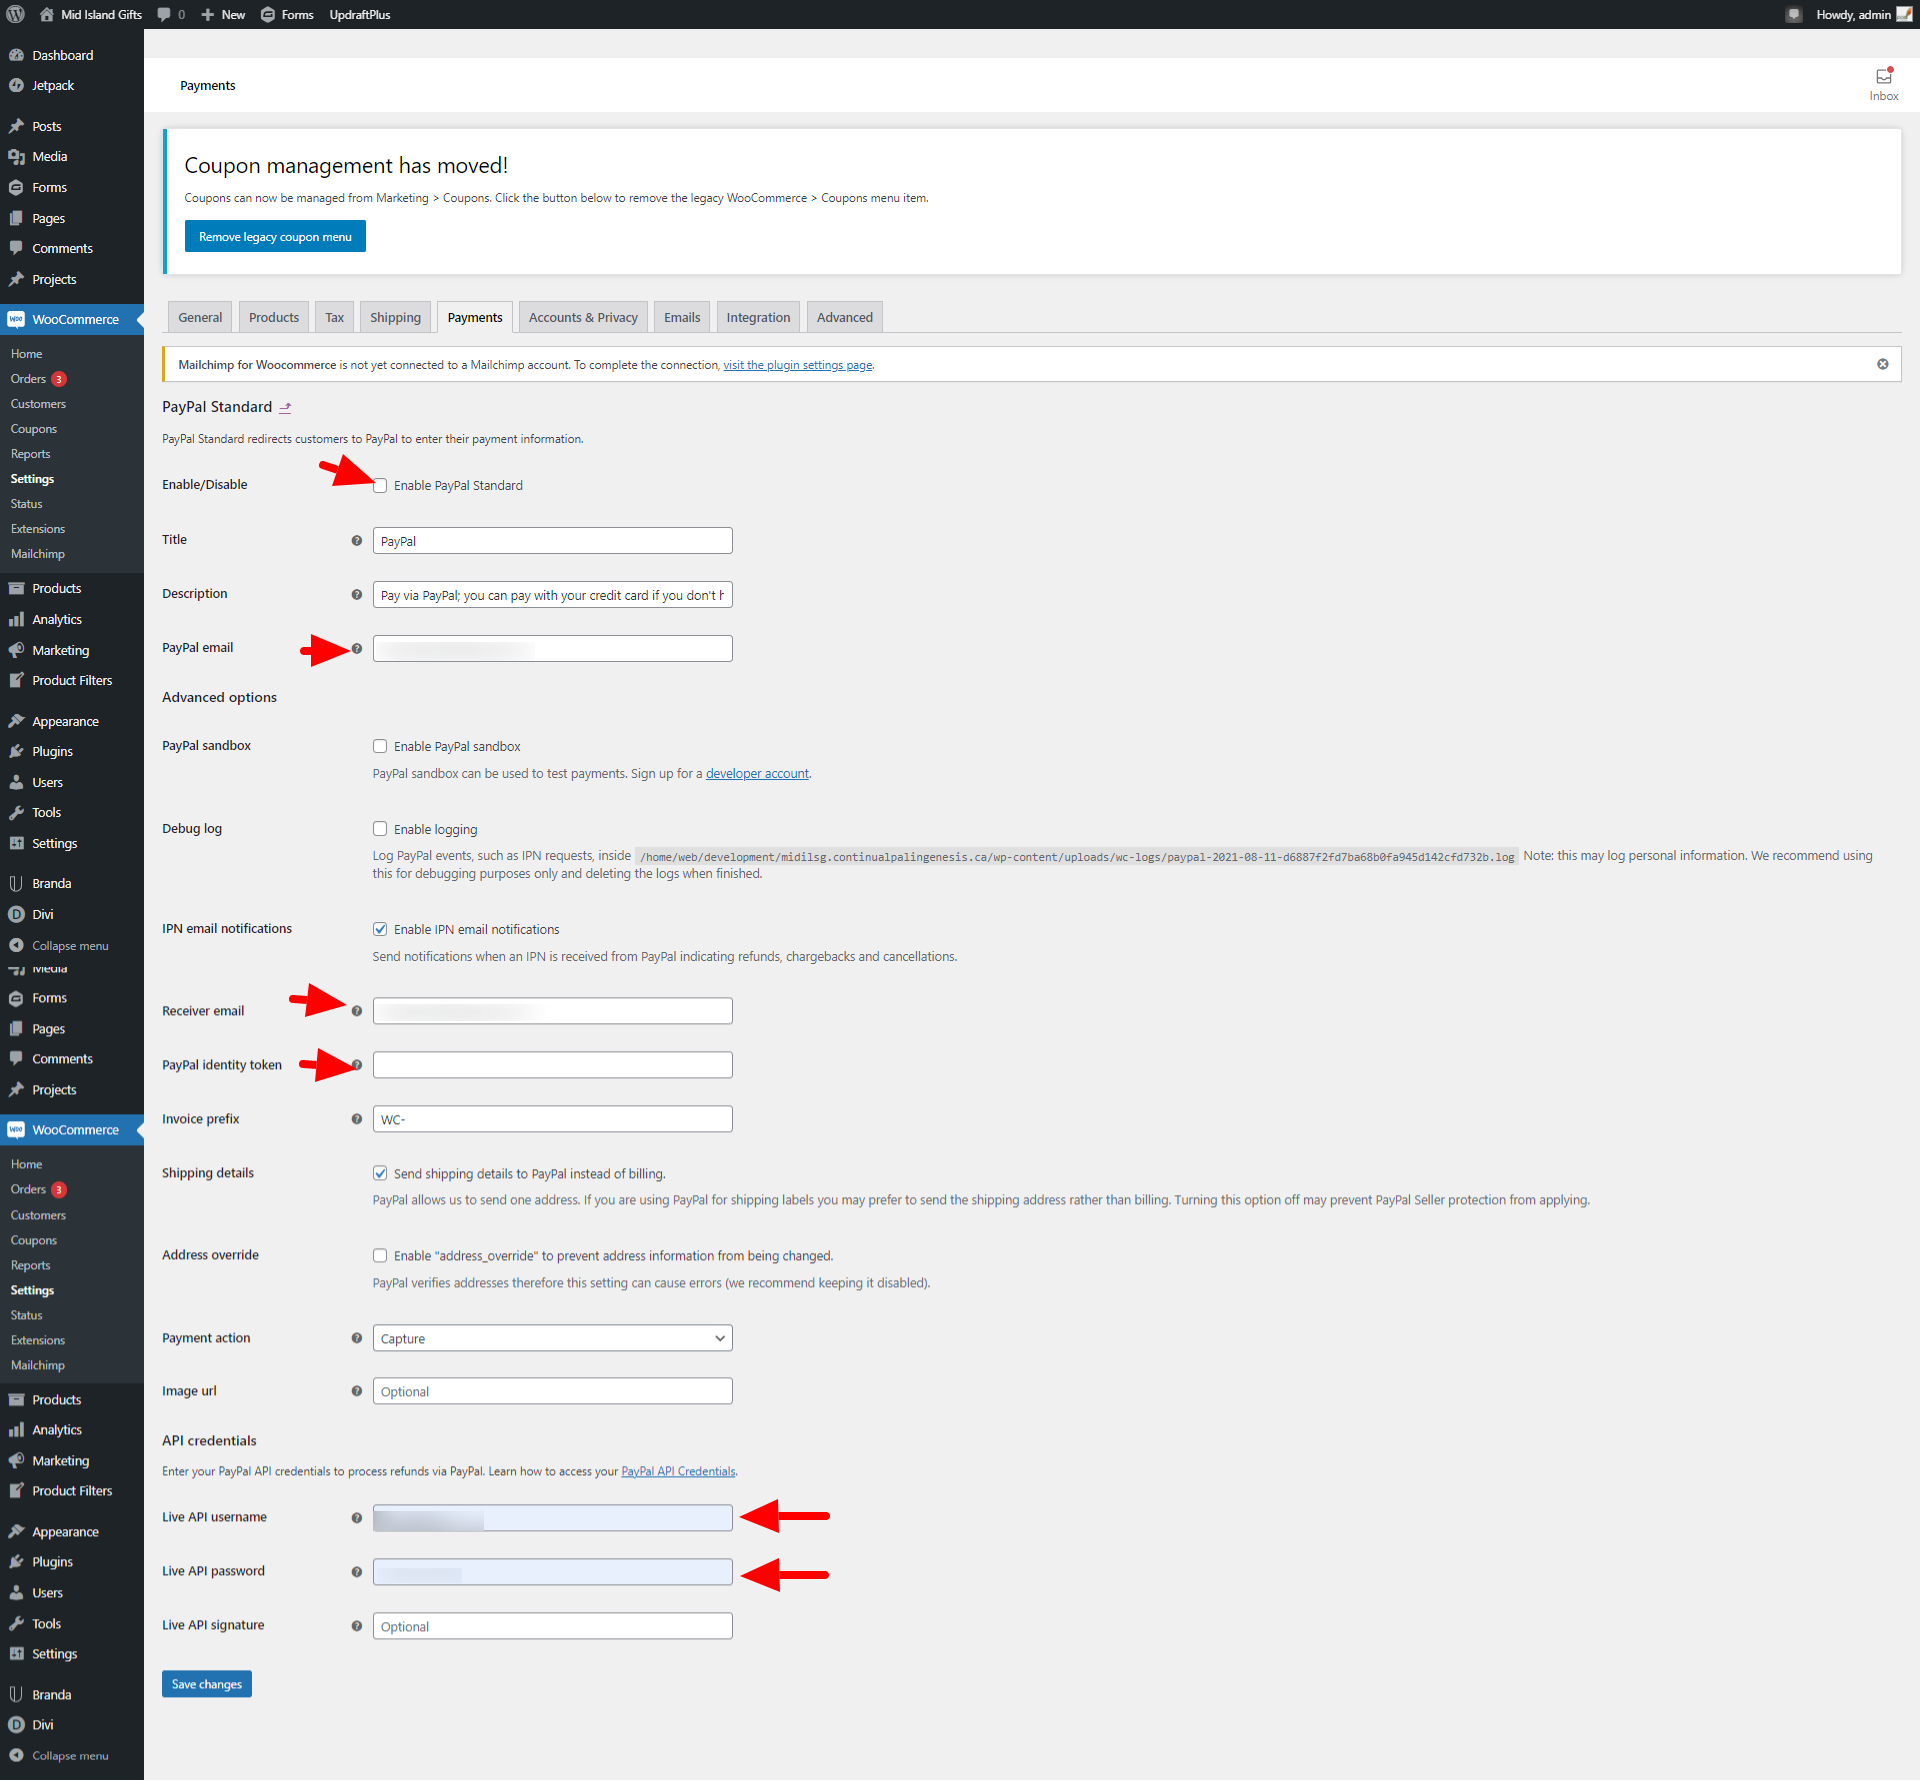
A.) Choose the payment option you would like to use. *** If you are planning to use PayPal as the payment option choose “Paypal Standard”.
B.) Click Setup on the right-hand side.

C.) Add in all the required information. As a note, this will require you to be logged into your payment choice account.
D.) Ensure you set up your API credentials correctly, this will allow you to do automatic refunds in your payment gateway option.
E.) Save your changes and enable the payment option.
Step 2: Doing an Automatic Refund
1. Make sure your payment gateway is set up properly
A) Start at the dashboard of your website.
B) Click on WooCommerce, then Settings, then Payments.
C) Click Manage beside your chosen payment option. Ensure the API is properly set up for refunds. (See step D above.)
2. Lets refund!
A.) Click on WooCommerce, then Orders.
B.) Find the order you wish to refund and click on it.
C.) Click Refund.
D.) Specify the quantity of the product(s) to be refunded in the text box(es) that appear for each line item. The refund amount will automatically adjust based on the products refunded. If inventory levels are not managed, you can also enter the Refund amount, without adjusting the product quantity.
E.) Select “Refund $XX.XX via [your gateway]”.
F.) Order Notes in the right sidebar will log refunds. Keep an eye on the order notes to learn if it’s been logged or if there’s an error message. A successful “Refunded” message in order notes concludes the refund.
Alternative Step 2: Doing a Manual Refund
1. Sometimes an automatic refund is not possible
Depending on your payment gateway, refunds that automatically come out of your bank account may not be available. Follow the below steps to process a manual refund.
2. Lets refund!
A.) Click on WooCommerce, then Orders.
B.) Find the order you wish to refund and click on it.
C.) Click Refund.
D.) Specify the quantity of the product(s) to be refunded in the text box(es) that appear for each line item. The refund amount will automatically adjust based on the products refunded. If inventory levels are not managed, you can also enter the Refund amount, without adjusting the product quantity.
E.) Select “Refund $XX.XX ” Manually.
F.) Order Notes in the right sidebar will log refunds. Keep an eye on the order notes to learn if it’s been logged or if there’s an error message. A successful “Refunded” message in order notes concludes the refund.
G.) Now you will need to actually refund the client using your payment gateway, cash, check, or however you choose to refund.


