Since we created this post we have had a lot of traffic, Thank you, everyone! This post was created in 2017. The info below is outdated and we are looking to keep it fresh. Here is a link to the Elegant Themes website with the latest information on the Divi contact form.
Customizing your contact form in DIVI

In this tutorial I will walk you through customizing the contact form module within the Divi theme. If you are one of our clients, you already know how versatile we think the Divi theme is. If you're just checking out the site, we encourage you to check out their site demo on the Elegant Themes website.
*Updated March, 2017 - I've added some custom css to our contact form to jazz it up!
**DIVI updates the Contact Form - June 2017 - New features and functions.
Adding a Contact Form Module
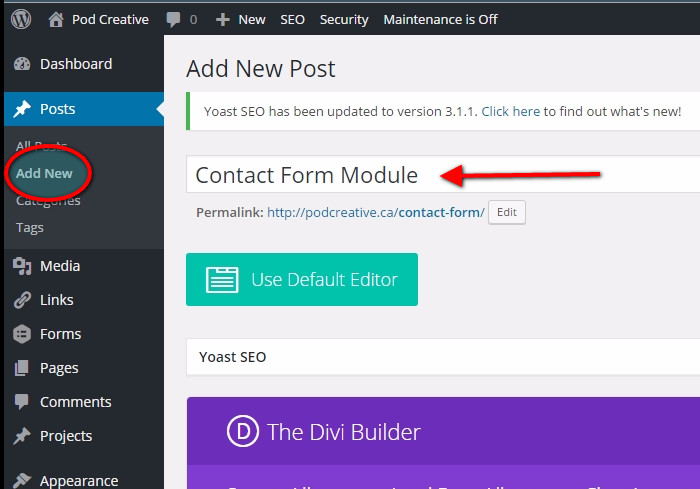
I have created a new post by clicking on Add New under the Posts menu in the main WordPress Dashboard. Give your post a Title, in this case I'm using 'Contact Form Module'.
 NEWS & EVENTS
- An error has occurred, which probably means the feed is down. Try again later.
WP TUTORIALS
- An error has occurred, which probably means the feed is down. Try again later.

Use the Divi Builder
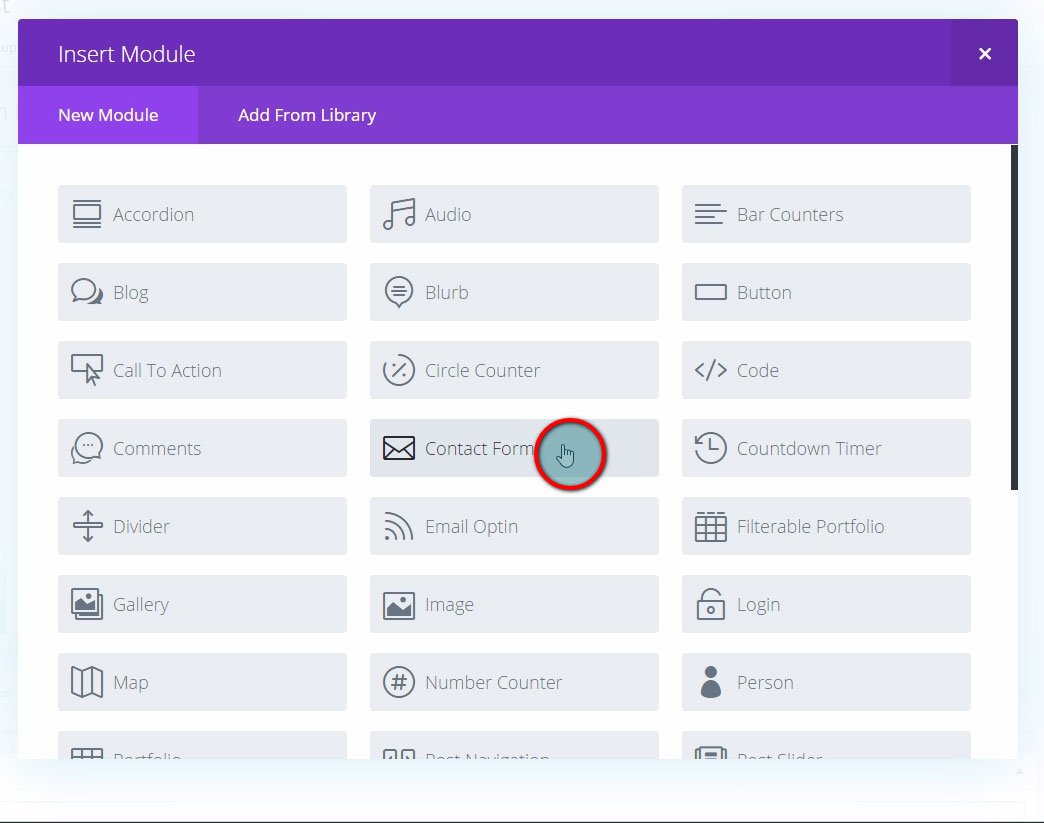
If the Divi Builder is not open, click on the Use The Divi Builder button. Once open, click on the Insert Column(s) and choose the configuration you prefer. I have kept things simple and selected two columns for this post. Next, click on the Insert Modules(s) column where you want your contact form and select the Contact Form module from the options.

Contact Form Module Settings
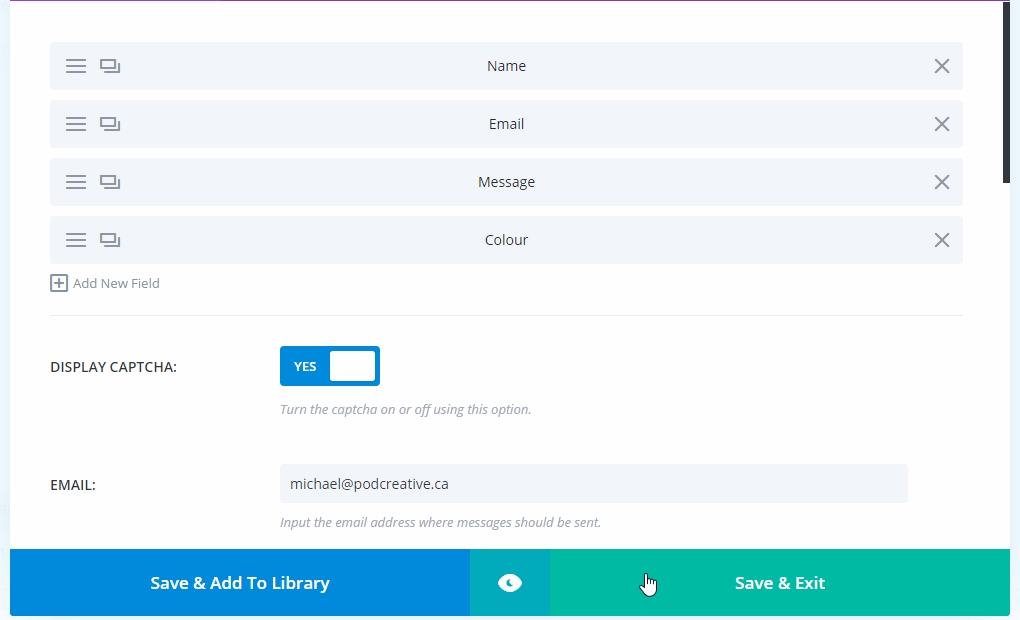
We are now in the Contact Form module and we can see that the default has a Name, Email and Message fields. We're going to leave them as they are for the moment. As we explore the module we find a Captcha option (an easy test if you're human or a bot).
Next there are several fields that need to be filled in. What email will the contact emails be going to? Do you want to set a standard subject title for the contact email? You can also set us a specific message pattern, I will be leaving this blank for this tutorial.
Finally, you can have the user redirected to a new URL after completing the form and set a message to display after a successful submission.

Contact Fields
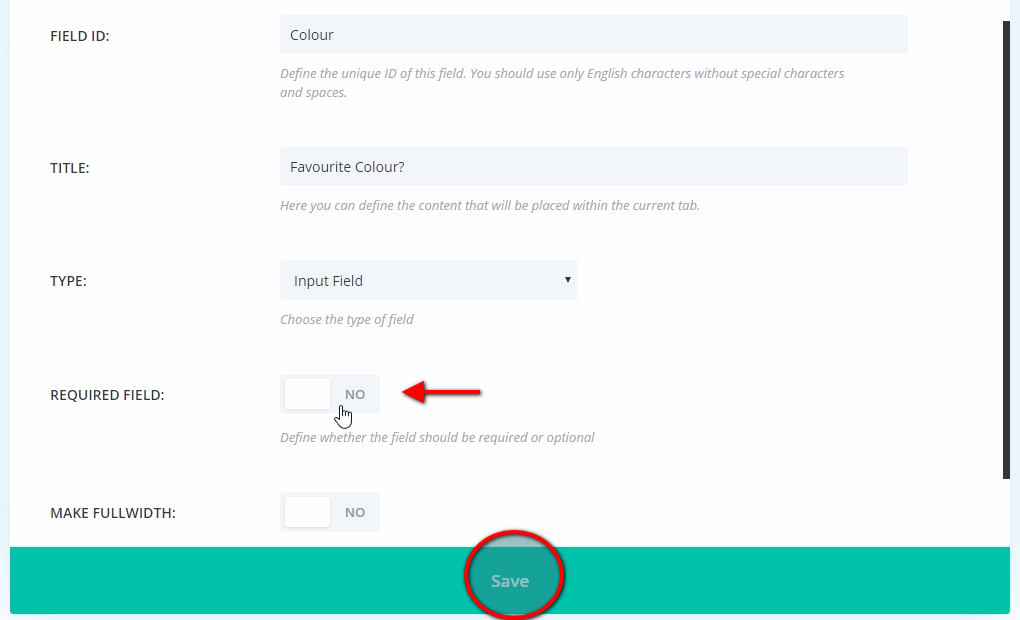
When you click on the hamburger menu on the left side of the Name field you are brought to the general settings. We can set the Field ID (what we see in the form module), the title, type and if this field will be required or optional. Select the type option you want from the drop down menu for your field (Input, Email or Textarea). Save your changes to the Field settings.

I have added another field with another simple question but I have set to not be a required answer. Once you have all the fields you want click Save & Exit.
Finish Your Post!
I'm happy with the contact form and I've added an image to the empty column. Making sure to set my feature image, tags, categories and publish date I'm ready to preview the post and if all is correct publish it.

Click here to view my example of a contact form, or have a look at the screenshot below.

More Customization
While our original contact form is very straight forward, we can add some css code to make it a little more engaging. The microinteraction we're adding is a great example of a current trend in website development focused on giving more information to website users in a subtle way.
CSS Magic
Add the CSS Class 'border-left'.

In a new tab, go to Divi, then Theme Options. Copy and paste the following code into the Custom CSS field:
.border-left .et_pb_contact p input, .border-left .et_pb_contact p textarea {
height: 60px;
border-left: 4px solid #ddd;
-moz-transition: all 0.2s ease-out;
-ms-transition: all 0.2s ease-out;
-o-transition: all 0.2s ease-out;
transition: all 0.2s ease-out;
}
.border-left .et_pb_contact p input:hover,.border-left .et_pb_contact p textarea:hover, .border-left .et_pb_contact p input:focus, .border-left .et_pb_contact p textarea:focus {
border-left: 8px solid #808000;
font-size: 16px;
}
And you're done! Now your contact form will display a coloured bar on the field you're hovering over. If you want to change the colour of the bar you can change the colour value in this part of the code: border-left: 8px solid #808000; .

Updates from Divi
Divi has raised the bar again. They have taken the contact form module and expanded it's functionality to rival third party plugins like Contact Form 7, JotForm or Gravity Forms. And while the updated Divi contact form doesn't do everything the other forms do it really closes the gap and removes the need for the other plugins unless you're getting really advanced.
Checkboxes, dropdowns, radio buttons and more
You will now find a checkbox option when you create a new field in the module. Checkboxes are a great for getting information quickly. The new input selection type now supports dropdown menus and radio buttons. These new options speed up user interactions with your form and also help you get specific the specific answers you need.

Conditional Logic!
In my opinion the best part of the Divi Contact Form update is the addtion of conditional logic. Your forms just became so much more than a tool for audience interaction.
Conditional Logic allows you to configure your form to show or hide fields, sections, pages or even the submit button based on user selections. This allows you to easily control what information your user is asked to provide on your WordPress powered site and tailor the form specifically to their needs.
Now you can create dynamic forms with hidden fields that only display if the user selects specific options. It's a great feature if you're creating an order form, information questionaire or work order. Divi has created a really robust system that allows mixing and matching various logic rules so you can create just about anything!
Need help with your Divi website?
Get in touch with us about your site or subscribe to our newsletter for our latest tips, tutorials and more.